Click on the [Advanced] button, select the [Delete extra files] checkbox to enable the delete extra file option.
 When the [Delete extra files] option is enabled, the restore process will attempt to synchronize the selected restore source with the restore destination.
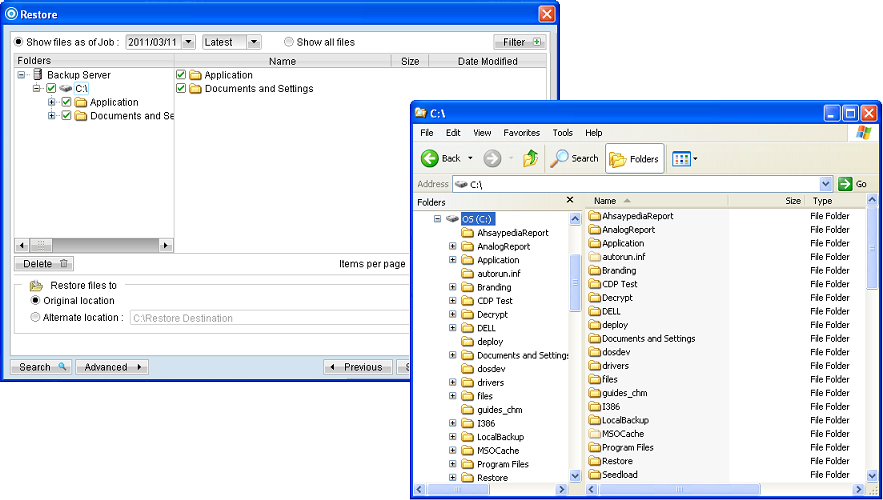
In the image above, where C:\ is selected as the restore source, and [Original location] is selected as the restore destination.
The restore process will attempt to synchronize the restore destination (current C:\ on the client machine) with the restore source (C:\ that is backed up on the backup server).
Specifically, the restore process will restore the Application, Documents and Settings folders and the data within, and then delete all other data on C:\ to mirror the restore source and destination.
Prior to the data synchronization, the backup application will prompt for confirmation:
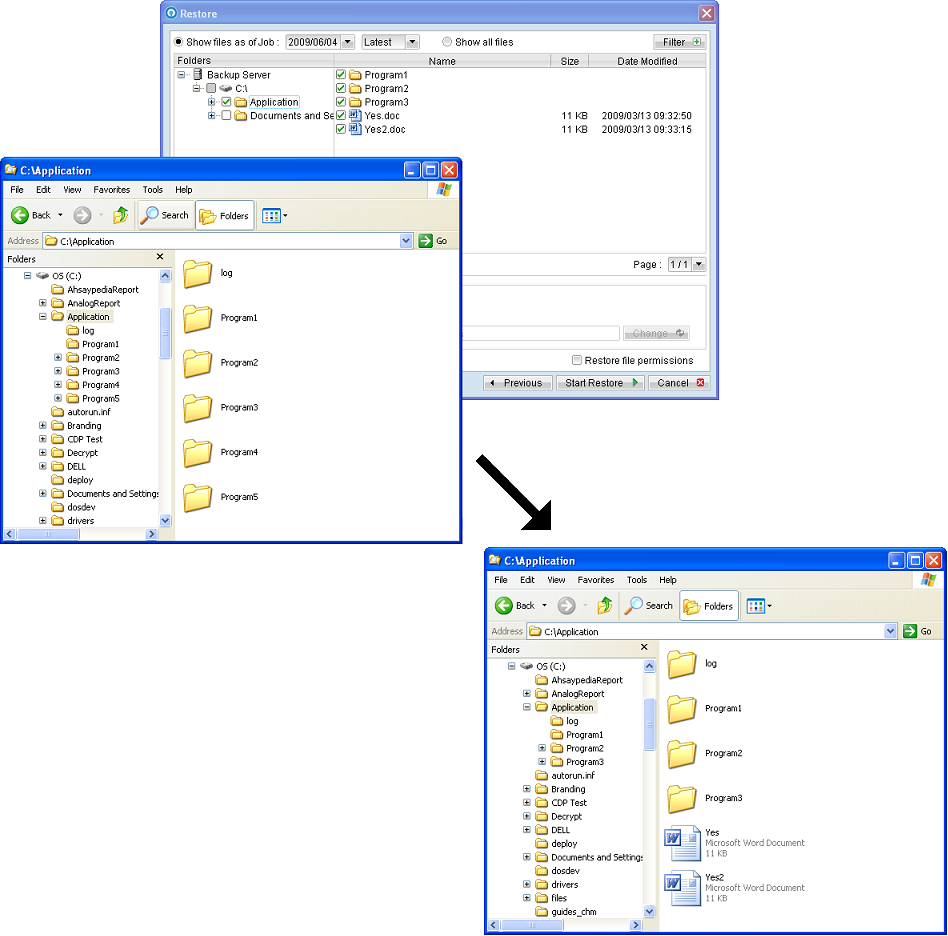
 When using the [Delete extra files] option, please select the lowest possible child directories or files, instead of the highest parent directories for synchronization.
To demonstrate, assuming that you want to synchronize the restore destination (e.g. C:\Application) with the backed up C:\Application folder (restore source), select the Application folder, instead of the C:\ for restore.
When using the [Delete extra files] option, please select the lowest possible child directories or files, instead of the highest parent directories for synchronization.
To demonstrate, assuming that you want to synchronize the restore destination (e.g. C:\Application) with the backed up C:\Application folder (restore source), select the Application folder, instead of the C:\ for restore.